Pizzachef.it

Categoria: Articoli

The Red Gold of Naples: Why San Marzano Tomatoes Are Non-Negotiable
Whole peeled San Marzano tomatoes with their rich red color and elongated shape.

If the crust is the soul of a Neapolitan pizza, then the tomato sauce is its lifeblood. A common question from aspiring pizzaiolos is, “Can I just use any good quality canned tomato?” For a purist, and for anyone following the official Disciplinare, the answer is a definitive and resounding no.

There is only one king, one choice for true Neapolitan pizza: the San Marzano tomato. This article explores why this specific variety isn’t just a preference; it’s a fundamental pillar of authenticity.

What is a San Marzano Tomato?

The San Marzano is a unique heirloom variety of plum tomato. Visually, it’s distinct for its elongated, oblong shape. But its true magic lies in its flavor and texture. Compared to more common varieties like the Roma, the San Marzano has:

  • Thicker flesh with fewer seeds.
  • A much lower water content.
  • A perfect, delicate balance of sweetness and acidity.

This perfect profile is a direct result of its unique terroir: the volcanic soil of the Agro Sarnese-Nocerino region of Italy, near Mount Vesuvius. The soil, rich in minerals, gives the San Marzano a deep, complex flavor that cannot be replicated anywhere else in the world.

The “D.O.P.” Seal: A Guarantee of Authenticity

To protect this unique culinary heritage, true San Marzano tomatoes are protected by a D.O.P. seal. D.O.P. stands for Denominazione di Origine Protetta (“Protected Designation of Origin”).

Think of it like the seal on a fine bottle of Champagne or a wheel of authentic Parmigiano-Reggiano. It is a legal guarantee from the European Union that the product was grown, processed, and packaged within its specific, traditional region and according to strict government-regulated standards. This seal is your shield against imposters.

Close-up of the official D.O.P. and Consorzio seals on a can of San Marzano tomatoes.

How to Spot a Real San Marzano D.O.P.

Many cans are designed to look like the real thing. Here is what you must look for to ensure you are buying a genuine product:

  • The Official D.O.P. Seal: Look for the red and yellow starburst seal that says “D.O.P.”.
  • The Consorzio Seal: There should be a second seal with a serial number from the official consortium that protects San Marzano tomatoes.
  • The Exact Wording: The can must state “Pomodoro San Marzano dell’Agro Sarnese-Nocerino.” If it just says “San Marzano Style” or “Italian Tomatoes,” it is not the real thing.
  • Must Be Whole or in Fillets: By law, D.O.P. San Marzanos can only be packaged whole or in fillets, never diced, puréed, or as a sauce. They must be peeled.

Why Other Tomatoes Don’t Compare for Pizza Sauce

The beauty of a Neapolitan pizza sauce is its simplicity: the tomatoes are simply crushed by hand with a pinch of salt. That’s it. There is no long cooking process and no sugar to balance acidity.

Using a more acidic, watery tomato would require adding sugar and cooking it down to remove excess water. This fundamentally changes the flavor and texture, moving you away from the fresh, vibrant taste that defines the authentic Neapolitan style. The San Marzano’s natural perfection makes this simple, pure approach possible.

From Knowledge to Professional Application

Understanding the critical importance of an ingredient like the San Marzano D.O.P. is what separates a good cook from a great chef. However, applying this philosophy of uncompromising quality across an entire menu, within a profitable restaurant model, requires a deeper strategic approach.

It involves sourcing, supply chain management, menu costing, and staff training—all essential components of a successful culinary business.

For professional chefs and restaurateurs looking to build a brand founded on this level of authenticity, the consulting services at pizzaiolo.in offer the framework and expertise to make it a reality.

Conclusion: An Ingredient That Defines a Dish

The San Marzano tomato is not just an ingredient; it’s a testament to the idea that in Italian cuisine, simplicity and quality reign supreme. Its unique, balanced flavor is the reason why a true Margherita or Marinara pizza needs nothing more to be a masterpiece.

The choice of tomato is a critical part of the official rules that protect this culinary art form. To learn more, read our definitive guide: The Official Disciplinary of True Neapolitan Pizza.

Read More
The Soul of the Crust: A Deep Dive into '00' Flour for Neapolitan Pizza
A chef's hand scooping fine, white '00' flour from a wooden bowl.

The soul of a great pizza is the crust. And the soul of a great crust is the flour. For anyone dedicated to the art of authentic Neapolitan pizza, the term ’00’ flour is spoken with a certain reverence. It’s considered the gold standard, the non-negotiable foundation for perfection.

But what does “00” actually mean? Is it a magic ingredient? The answer is both simpler and more complex than you might think. This guide will deconstruct the myths and reveal the science behind the world’s most famous pizza flour.

What Does “00” Actually Mean? Deconstructing the Myth

The most common misconception about ’00’ flour is that the number refers to protein content or gluten strength. This is incorrect.

In the Italian flour classification system, the number (from “2” down to “00”) refers to the fineness of the grind and how much of the bran and germ have been removed.

  • Tipo “2” is the coarsest grind, similar to whole wheat flour.
  • Tipo “1” is less refined.
  • Tipo “0” is finer still.
  • Tipo “00” is the most refined, finest grind available. It is silky and powdery to the touch, like talcum powder.

The benefit of this incredibly fine texture is that the flour hydrates very easily, creating a silky, smooth dough that is a pleasure to work with and produces the characteristic soft, tender crust of a Neapolitan pizza.

The True Secret: Protein Content and the ‘W’ Index

While the “00” tells you about the flour’s texture, the most crucial factor for a pizzaiolo is the flour’s strength. This is determined by its protein content and quality, which is measured in Italy by the ‘W’ Index.

The W Index is a technical measurement that tells a baker how strong the gluten network will be. A higher ‘W’ number means a stronger flour, capable of longer fermentation times.

  • W 170-200 (Weak): For biscuits and crackers. Cannot handle long fermentation.
  • W 220-280 (Medium): The sweet spot for classic Neapolitan pizza with direct dough methods (8-24 hour fermentation).
  • W 300-380 (Strong): For long fermentation doughs like biga or poolish, and for breads like Panettone.

For a true Neapolitan pizza, you need a ’00’ flour with a medium W-index (W 220-280). This provides the perfect balance: enough strength to support a 24-hour fermentation, but not so much that the final crust becomes tough and overly chewy.

A diagram explaining the W-index scale for Italian flours

’00’ Flour vs. The World: All-Purpose and Bread Flour

How does ’00’ flour compare to what’s commonly available in supermarkets?

’00’ Flour: The Specialist

Finely milled with a specific, medium protein content. It is designed to create a crust that is both soft and stable, with a slight chew but never tough. It is the only choice for authentic results.

Bread Flour: The Powerhouse

Often coarsely milled and very high in protein (a high ‘W’ value). Using bread flour for Neapolitan pizza will result in a crust that is overly chewy, heavy, and more like a traditional bread loaf. It’s the wrong tool for the job.

All-Purpose Flour: The Jack of All Trades

This is the most inconsistent option. Its protein content varies wildly between brands. While you *can* make pizza with it, you will never achieve the specific texture, tenderness, or “leopard-spotted” crust of a true Neapolitan pizza.

The Right Foundation for an Authentic Masterpiece

Understanding flour is the first step on the journey to mastering pizza. Choosing a finely milled ’00’ flour with the correct strength (a medium W-Index) is the foundational secret to creating a light, digestible, and delicious crust.

Of course, the perfect flour is just one part of the story. It must be combined with the right techniques, ingredients, and baking environment to create a true work of art.

To see how the perfect flour fits into the complete set of rules for authentic pizza, be sure to read our definitive guide: The Official Disciplinary of True Neapolitan Pizza.

Beyond Tradition: Bringing Authenticity to the Global Stage

Knowing the rules is one thing. Implementing them consistently in a professional, profitable restaurant—especially in a dynamic and demanding market like India is another challenge entirely. It requires not only a master’s knowledge of the craft but also deep expertise in sourcing ingredients, selecting the right equipment, and training a team to execute flawlessly.

This is where tradition meets modern consultancy. While this site, Pizzachef.it, is dedicated to the soul and history of the craft, we are experts in professional application.

For restaurateurs and professionals aiming to build a successful business based on these authentic principles, the expert consulting services at pizzaiolo.in provide the strategic guidance needed to turn passion into profit.

Read More
Joe Stanchi
The Official Disciplinary of True Neapolitan Pizza: Why Not All Pizzas Are Created Equal

In pizzerias all over the world, from Napoli to Delhi, you’ll see the promise of “True Neapolitan Pizza.” But is it genuine?

The art of Neapolitan pizza is not a matter of opinion; it is a cultural heritage protected by a precise set of rules known as the Disciplinare.

This guide is for the purists, the passionate, and the professionals who believe in authenticity. We will delve into the official regulations that separate a true Neapolitan pizza from a simple imitation, and explore why these rules are fundamental to creating a culinary masterpiece.

What is the “Disciplinare STG”? A Mark of Authenticity

The “Disciplinare” is a legal document that outlines the traditional recipe and preparation method for Neapolitan Pizza. This isn’t just a recipe; it’s a standard that allows the product to be certified as a “Specialità Tradizionale Garantita” (STG), or “Traditional Specialty Guaranteed.” This European Union mark protects culinary traditions and ensures that any pizzeria claiming to serve “Vera Pizza Napoletana” adheres to these uncompromising standards.

The 5 Pillars of Authentic Neapolitan Pizza

The disciplinare is built upon five sacred pillars. Deviating from even one means the result, while perhaps delicious, is not true Neapolitan Pizza.

1. The Dough (L’Impasto): The Four Sacred Ingredients

The foundation of it all. The dough must be made only with Type “00” or Type “0” flour, water, salt, and yeast (brewer’s yeast or natural starter). The hydration must be precise, and the dough must be left to rise for at least 8 hours. The result is a soft, elastic, and highly digestible base.

2. The Shaping (La Stesura): By Hand, and Only By Hand

This is non-negotiable. The use of a rolling pin or any mechanical press is strictly forbidden. The dough must be shaped by hand using the traditional “a schiaffo” (slapping) technique.
This method moves the air from the center to the edge, creating the characteristic puffy crust, the cornicione.

3. The Toppings (I Condimenti): The Purity of Simplicity

The disciplinare recognizes only two classic variations:

  • Marinara: San Marzano tomatoes, fresh garlic, oregano, and extra virgin olive oil.
  • Margherita: Mozzarella di Bufala Campana DOP (or Fior di Latte), fresh basil, and extra virgin olive oil.

The use of these specific, high quality ingredients is fundamental.

4. The Baking (La Cottura): 90 Seconds of Fire

The pizza must be cooked in a traditional wood-fired oven (“forno a legna”) at an incredibly high temperature of approximately 485°C (905°F). The baking must be rapid, lasting no more than 60-90 seconds.

This intense heat cooks the pizza instantly, creating a soft, moist center and a perfectly charred, puffy crust.

5. The Final Appearance (L’Aspetto Finale): The Signs of Perfection

A true Neapolitan pizza is visually distinct. It should be round, no more than 35cm in diameter, with a raised, golden brown crust (the cornicione) of 1-2cm. It should be soft, fragrant, and feature the characteristic “leopard spotting” small, charred bubbles on the crust.

Neapolitan pizza as por Disciplinary AVPN
Ruota di carro pizza napoletana

Beyond Tradition: Bringing Authenticity to the Global Stage

Knowing the rules is one thing. Implementing them consistently in a professional, profitable restaurant especially in a dynamic and demanding market like India is another challenge entirely. It requires not only a master’s knowledge of the craft but also deep expertise in sourcing ingredients, selecting the right equipment, and training a team to execute flawlessly.

This is where tradition meets modern consultancy.
While this site, Pizzachef.it, is dedicated to the soul and history of the craft, our partners are experts in professional application.

For restaurateurs and professionals aiming to build a successful business based on these authentic principles, the expert consulting services at Pizzaiolo.in provide the strategic guidance needed to turn passion into profit.

A Legacy, Not Just a Lunch

The Disciplinare of Neapolitan Pizza is more than a recipe; it’s a declaration of cultural identity. It ensures that every time you enjoy a “Vera Pizza Napoletana,” you are partaking in a tradition of craftsmanship, quality, and passion that has been perfected over centuries.

It’s not just a pizza; it’s a masterpiece.

Read More
Joe Stanchi
The Ultimate Guide to Making Sourdough Starter at Home

The Ultimate Guide to Making Sourdough Starter at Home: A Journey into Traditional Baking

Sourdough, one of the oldest forms of leavened bread, has been a staple in the diets of many civilizations for centuries. Its recent resurgence in home kitchens and artisanal bakeries around the world is no coincidence—baking with sourdough connects us to tradition, flavor, and a natural fermentation process that is both healthier and more sustainable than using commercial yeast. At the heart of sourdough bread is the sourdough starter, a simple mixture of flour and water that captures wild yeast and beneficial bacteria from the environment to naturally leaven bread.

In this comprehensive guide, we’ll walk you through everything you need to know about making and maintaining your own sourdough starter at home. We will also dive into the science behind sourdough fermentation, the benefits of using sourdough over commercial yeast, and how to use your starter in a variety of delicious recipes—from traditional bread loaves to pizza and pastries. Whether you’re a beginner or an experienced baker, this guide will help you master the art of sourdough and take your home baking to the next level.


Why Make Your Own Sourdough Starter?

While many home bakers rely on store-bought yeast for convenience, creating your own sourdough starter opens up a world of flavor, texture, and health benefits that commercial yeast simply can’t match. Here are a few reasons why making your own sourdough starter is worth the effort:

  1. Superior Flavor: Sourdough bread has a distinctive tangy flavor that develops during the long fermentation process. The lactic acid produced by the bacteria in the starter adds depth and complexity to the bread’s taste, which is something you won’t get from bread made with instant yeast.
  2. Improved Digestibility: The fermentation process involved in sourdough breaks down gluten and other complex carbohydrates, making the bread easier to digest. This can be beneficial for individuals with mild gluten sensitivities or those looking for a healthier alternative to commercially leavened bread.
  3. Nutritional Benefits: Sourdough bread has a lower glycemic index than bread made with commercial yeast, meaning it can help regulate blood sugar levels more effectively. The long fermentation process also makes nutrients like zinc, magnesium, and iron more bioavailable, leading to better overall nutrition.
  4. Longer Shelf Life: The acidity of sourdough inhibits the growth of mold, giving your bread a longer shelf life without the need for preservatives. Properly made sourdough can stay fresh for up to a week.
  5. Sustainability: Making your own starter is a sustainable, waste-free process. Once your starter is active, you can use it to leaven bread, pizza, and other baked goods indefinitely as long as it is properly maintained. This means no more reliance on store-bought yeast packets.

The Science Behind Sourdough: Fermentation and Wild Yeast

At the core of sourdough baking is fermentation, a natural process that uses wild yeast and lactic acid bacteria to leaven dough. Unlike commercial yeast, which is a single species of yeast (Saccharomyces cerevisiae) that works quickly to rise dough, sourdough starter is home to a diverse community of microorganisms, including wild yeast and lactic acid bacteria.

The yeast in your starter consumes sugars in the flour and produces carbon dioxide gas, which causes the dough to rise. Meanwhile, the lactic acid bacteria produce lactic acid and acetic acid, which not only give sourdough its characteristic tang but also improve the dough’s texture and shelf life.

Wild Yeast vs. Commercial Yeast

  • Wild yeast: Found naturally in flour and in the environment, wild yeast works slower than commercial yeast, but it adds complex flavors and better digestibility to the bread. It can survive in a more acidic environment, which is why it thrives in sourdough starters.
  • Lactic acid bacteria: These beneficial bacteria coexist with wild yeast in your starter and play a critical role in the fermentation process. They are responsible for the production of acids, which lower the dough’s pH and create a tangy flavor profile.

This symbiotic relationship between wild yeast and lactic acid bacteria is what makes sourdough unique. It results in a longer fermentation process but rewards you with deeper flavors, improved texture, and enhanced nutrition.


Step-by-Step Guide: How to Make Sourdough Starter at Home

Creating a sourdough starter at home requires just two basic ingredients: flour and water. However, it also requires patience, as it takes time for the starter to become fully active and ready for baking. Follow this step-by-step guide to create your own sourdough starter from scratch.

Ingredients:

  • 100g water (preferably filtered or non-chlorinated)
  • 200g flour (type 1 flour, whole grain, or rye works best for creating a robust starter)

Equipment:

  • A clean glass or plastic container
  • A spoon or spatula for mixing
  • Plastic wrap or a clean kitchen towel for covering

Phase 1: The Initial Mix

  1. In a clean bowl, combine 100g of water with 200g of flour. Stir until a smooth, lump-free dough forms.
  2. Transfer the dough to a glass container, cover it loosely with plastic wrap or a kitchen towel, and let it sit at room temperature (ideally around 22-25°C or 72-77°F) for 12-24 hours.

During this time, the wild yeast and bacteria will begin to activate, although you might not notice any visible changes immediately.

Phase 2: First Feeding (24 Hours Later)

  1. After the first 24 hours, discard about half of the mixture (this helps control the acidity and gives the yeast more food to work with).
  2. Add 100g of fresh water and 100g of flour to the remaining mixture. Stir well to combine, then cover again and let it sit at room temperature for another 24 hours.

Phase 3: Regular Feedings (Days 3-7)

Continue feeding your starter every 24 hours by discarding half of the mixture and replacing it with equal parts water and flour. By the third or fourth day, you should start to notice small bubbles forming in the mixture, indicating that fermentation is taking place.

As the days go by, the starter will become more active, and you may notice a tangy aroma developing.

Phase 4: Ready for Baking (Day 7 and Beyond)

By the end of the first week, your sourdough starter should be bubbly, have a pleasant, tangy smell, and double in size a few hours after feeding. Once it reaches this point, it is ready to be used for baking.

To test if your starter is ready, place a spoonful of it in a glass of water. If it floats, your starter is active enough to leaven bread. If it sinks, continue feeding it for a few more days.


How to Maintain and Store Your Sourdough Starter

Once your sourdough starter is active, it requires regular maintenance to stay healthy. If you’re baking frequently, you can keep it at room temperature and feed it once a day. However, if you only bake occasionally, it’s better to store your starter in the refrigerator.

Refrigeration Method:

  1. Feed your starter, then let it sit at room temperature for a few hours until it becomes bubbly and active.
  2. Cover the container and place it in the refrigerator. A refrigerated starter only needs to be fed once a week.
  3. When you’re ready to bake, remove the starter from the fridge, discard half, and feed it. Let it sit at room temperature until it becomes bubbly and doubles in size, then use it in your recipe.

Baking with Sourdough Starter: Recipes and Tips

Once your sourdough starter is fully active, it can be used in a variety of recipes. The most common use, of course, is in baking bread, but you can also incorporate your starter into pizza dough, pancakes, waffles, and even pastries. Here are a few tips for using your sourdough starter in different recipes:

  1. Sourdough Bread: The key to great sourdough bread is time. Allow the dough to ferment slowly for the best flavor and texture. Aim for a bulk fermentation of at least 4-6 hours, followed by a final proof in the refrigerator overnight.
  2. Sourdough Pizza: Sourdough makes an excellent base for pizza, particularly the Neapolitan style. Use a wet dough and let it ferment for 24 hours to develop the characteristic tang and soft, chewy texture. Pair with high-quality ingredients like San Marzano tomatoes, fresh mozzarella, and extra virgin olive oil for an authentic experience.
  3. Sourdough Pancakes and Waffles: A great way to use excess sourdough discard is in pancakes or waffles. The fermentation adds a light, fluffy texture and a slight tang that pairs well with syrup or fruit.

Common Mistakes to Avoid

As with any baking process, there are common pitfalls that can hinder your success. Here are a few to keep in mind:

  • Not feeding your starter enough: Underfeeding can lead to a weak starter that struggles to rise. Make sure to feed your starter regularly, especially if you keep it at room temperature.
  • Over-fermenting the dough: While long fermentation times are key to developing flavor, over-proofing your dough can result in bread that is dense or collapsed. Keep an eye on the dough and avoid letting it rise too much before baking.
  • Using too much flour or water: Maintaining a consistent ratio of flour and water is crucial to keeping your starter healthy. If the mixture becomes too dry or too wet, the wild yeast and bacteria may struggle to thrive. Stick to the recommended feeding ratios for the best results.
    Using improper water: Chlorinated or highly mineralized water can hinder the growth of the natural yeast and bacteria in your sourdough starter. Always use filtered or non-chlorinated water when feeding your starter to avoid this issue.
    Neglecting temperature control: Temperature plays a significant role in the activity of your starter. If the environment is too cold, the fermentation process will slow down, while too much heat can cause over-fermentation.
  • Try to keep your starter in a spot with consistent room temperature (around 22-25°C or 72-77°F).

    Expert Tips for Achieving Sourdough Perfection

  • If you want to take your sourdough baking to the next level, here are a few expert tips that will elevate your results:

  • Autolyse Technique: This is a resting period where the flour and water are mixed and left to hydrate before adding the sourdough starter. This process strengthens the dough, makes it easier to handle, and results in a better crumb structure.
    Stretch and Fold Method: Instead of kneading your dough, use the stretch and fold technique during the bulk fermentation phase. This method helps develop gluten without overworking the dough, leading to a more open crumb and better oven spring.
    Use a Dutch Oven: For a crisp, golden crust and excellent oven spring, bake your sourdough bread in a preheated Dutch oven. The enclosed environment traps steam, which helps create the perfect crust.
    Cold Fermentation: After shaping your dough, let it proof in the refrigerator for 12-24 hours. This slow fermentation process enhances the flavor and makes the dough easier to work with, especially when scoring.

    Common Issues and How to Fix Them
    Even experienced bakers encounter problems with their sourdough from time to time. Here are a few common issues and how to address them:
    Flat Bread: If your bread isn’t rising properly, your starter may not be active enough. Try giving it a few extra feedings before using it in your dough. Additionally, make sure you’re allowing enough time for bulk fermentation and final proofing.
    Dense Crumb: A dense, heavy crumb can be the result of under-fermentation. Ensure that your dough has enough time to ferment and proof properly. Also, avoid adding too much flour when shaping the dough.
    Sour Taste: If your bread tastes too sour, it may have over-fermented. Try reducing the fermentation time or lowering the hydration level slightly to prevent excessive acid production.
    Sticky Dough: If your dough is too sticky to handle, you may need to adjust the hydration level. Sourdough dough tends to be wetter than regular bread dough, but if it’s too difficult to work with, reduce the amount of water slightly or give it more time to develop gluten through folding.

    The Role of Sourdough in Pizza Making
    Sourdough isn’t just for bread—it’s also a fantastic base for pizza, especially if you’re aiming for that soft, chewy, and slightly tangy crust that defines a perfect Neapolitan pizza. The natural fermentation process adds layers of flavor that you just can’t achieve with commercial yeast.
  • Sourdough Neapolitan Pizza Recipe:
    Ingredients:
    500g Type 00 flour (or all-purpose flour)
    300g water
    100g active sourdough starter
    10g salt
    10g extra virgin olive oil
  • Instructions:
    In a large bowl, mix the flour and water. Let the mixture rest for 30 minutes (autolyse phase).
    Add the sourdough starter, salt, and olive oil. Mix until the dough comes together.
    Knead the dough for about 10 minutes or until smooth and elastic.
    Let the dough rest at room temperature for 4-6 hours, stretching and folding every 30 minutes during the first 2 hours.
    Divide the dough into balls and let them rest for another 2 hours before using them to make pizzas.
    Preheat your oven to its highest setting, preferably with a pizza stone or steel.
    Shape the dough into rounds, top with your favorite ingredients, and bake for 5-7 minutes until the crust is golden and the toppings are bubbling.

    Advanced Sourdough Techniques for the Ambitious Baker
    If you’ve mastered the basics of sourdough and want to push your skills further, consider experimenting with some of these advanced techniques:

  • Laminate Your Dough: This technique, commonly used in croissant making, can be applied to sourdough to create even more open crumb structures and a lighter texture.
    Add Whole Grains: Incorporating whole grains into your sourdough can add flavor, texture, and nutritional value. Try using spelt, rye, or whole wheat flour in place of a portion of the white flour.
    Enriched Sourdough: Adding ingredients like milk, butter, eggs, and sugar to your dough can create enriched sourdough loaves, which are softer and sweeter than traditional sourdough bread.
    Experiment with Hydration Levels: High-hydration doughs (those with more water relative to flour) are more challenging to handle but result in a more open crumb. If you’re comfortable with wet doughs, try increasing the hydration level of your sourdough for more artisan-style bread.

  • The Art and Science of Sourdough Baking
    Making sourdough starter at home is a rewarding process that connects you to a centuries-old tradition of natural fermentation.
  • By mastering the basic techniques outlined in this guide, you’ll be able to create delicious, nutritious, and flavorful bread with nothing more than flour, water, and time.
    From understanding the science of wild yeast and lactic acid bacteria to learning how to maintain and store your starter, you now have all the tools you need to embark on your sourdough journey. Whether you use your starter for classic loaves of bread, pizza, or creative bakes, sourdough offers endless possibilities for experimentation and growth as a baker.
    And remember, if you’re ever in doubt, the most important ingredient in sourdough baking is patience. Over time, you’ll develop an intuitive understanding of your starter, your dough, and the fermentation process, allowing you to create beautiful, flavorful bakes every time.
    For those passionate about culinary traditions and seeking professional guidance in the art of Neapolitan pizza or contemporary Italian cuisine, feel free to reach out for consultation.
  • With years of experience in the food and beverage industry, I’m here to help you perfect your craft and bring authentic Italian flavors to your kitchen, wherever you are in the world.

#SourdoughStarter #ArtisanBaking #SourdoughBread #NeapolitanPizza #BakingFromScratch #ItalianCuisine #Fermentation

Read More
Joe Stanchi
The Biga Method: A Complete Guide to Mastering Indirect Dough for Pizza

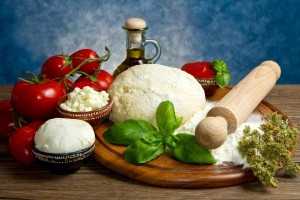
The art of pizza-making is deeply rooted in Italian tradition, where craftsmanship, precision, and time converge to create one of the world’s most beloved foods. Among the various dough-making techniques, the Biga method stands out as one of the most important and revered methods, offering a path to dough that is light, airy, and rich in flavor.

In this comprehensive guide, we will explore the history, science, and steps involved in the Biga method and how it can elevate the quality of your pizza, especially when applied to Neapolitan pizza, pizza in pala alla romana, and high-hydration breads. Whether you’re a professional pizzaiolo, baker, or a passionate home cook, mastering this method will unlock new potential in your pizza dough.

What is BIGA?

1. What Is Biga?

Biga is a type of preferment, a mixture of flour, water, and a small amount of yeast that is prepared in advance and allowed to ferment over an extended period, typically 16 to 20 hours. The term “biga” is derived from the Roman chariot or cart, symbolizing how this starter helps “drive” the dough to its final stage.

The biga method is characterized by its stiff, dry dough, which has a lower hydration level compared to other preferments like poolish or sponge. This lower hydration creates a unique fermentation environment that promotes the development of flavor compounds, enzymes, and organic acids, which not only improve the taste and texture of the final product but also contribute to a more digestible dough.

Biga is predominantly used in Italian breads, Neapolitan pizza, and pizza in pala alla romana (Roman-style pizza on a paddle), but it also has applications in other types of high-hydration breads. Its benefits include:

  • Enhanced flavor: The extended fermentation process results in more complex flavors, thanks to the production of organic acids.
  • Better texture: Biga doughs produce a final product with a light, airy crumb and large, irregular holes (alveoli).
  • Improved digestibility: The slow fermentation makes the dough easier to digest.

2. Why Use Biga in Pizza Dough?

The Biga method is particularly well-suited for certain types of pizzas and breads because of its unique characteristics. The dough that results from using biga offers qualities that are highly desirable in modern pizza-making.

a. Texture and Structure

The dough prepared with biga is known for its superior structure, which is soft, airy, and chewy, with irregular, large holes in the crumb. This is particularly valuable when making Neapolitan pizza, where the dough must be both light and pliable to create the characteristic thin, soft crust with a fluffy edge.

In high-hydration breads, biga helps achieve a beautifully open crumb, with large alveoli that are a hallmark of artisan bread-making.

b. Enhanced Flavor

Because of the extended fermentation time, biga encourages the development of organic acids and alcohol through the natural activity of yeast and bacteria. These compounds are responsible for the complex, slightly tangy flavors that are highly prized in artisan pizza and bread.

c. Digestibility

The long fermentation process allows the enzymes in the dough to break down the gluten and starches, making the dough easier to digest. This is particularly important in contemporary food culture, where many consumers are seeking pizzas and breads that are lighter and more digestible.

3. The Science Behind Biga: Understanding the Fermentation Process

Fermentation is the key to understanding why the biga method is so effective. When you prepare biga, you are essentially creating a controlled environment where yeast and bacteria can thrive, breaking down the starches in the flour and producing alcohol, carbon dioxide, and acids that contribute to the final flavor and texture of the dough.

a. Yeast Activity

In the biga method, the yeast is added at a very low percentage (usually 1% relative to the flour). The reason for this low yeast content is that biga ferments for a long period—typically 16 to 20 hours—so the yeast has ample time to multiply and generate the necessary gases and acids for fermentation.

b. Enzyme Activity

Two key enzymes, amylase and protease, play critical roles in the fermentation process. Amylase breaks down the starches in the flour into simple sugars that the yeast can consume. Protease breaks down gluten proteins, making the dough more extensible and giving it that soft, pliable texture.

c. Organic Acid Production

During fermentation, lactic acid bacteria naturally present in the flour also become active, producing lactic acid and acetic acid. These acids give the dough a complex flavor profile that includes tangy and slightly sour notes, similar to those found in sourdough bread. They also help strengthen the gluten network, which is essential for achieving that perfect chewy texture.

4. Step-by-Step Guide to Preparing Biga for Pizza

Now that we understand why biga is beneficial, let’s dive into the practical steps involved in preparing this type of dough. Precision is key in each stage, from ingredient ratios to temperature control.

a. Ingredients: The Key Ratios

  • Flour: 100%
  • Water: 45% (relative to the weight of the flour)
  • Fresh Yeast: 1% (relative to the weight of the flour)

For example, if you are using 1 kg of flour, you will need 450 g of water and 10 g of fresh yeast.

b. Mixing the Dough

  1. Dissolve half of the yeast in the water.
  2. Combine the flour and the other half of the yeast in a mixer. Start mixing at a low speed.
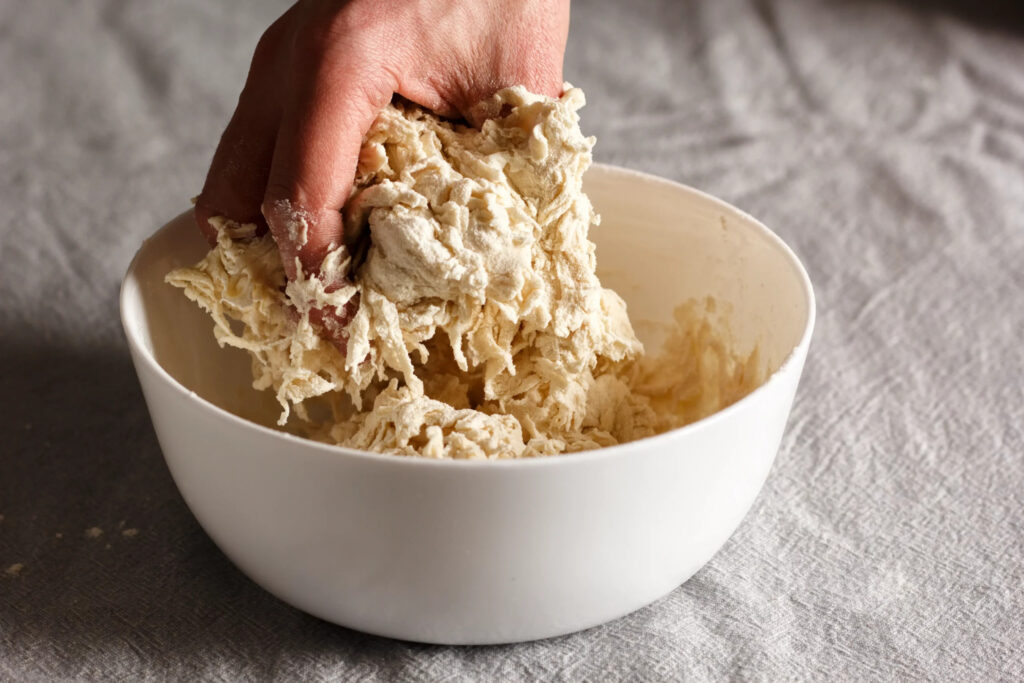
  3. Slowly add the water, making sure to form as many lumps and clumps as possible. This process should take about 4 minutes.
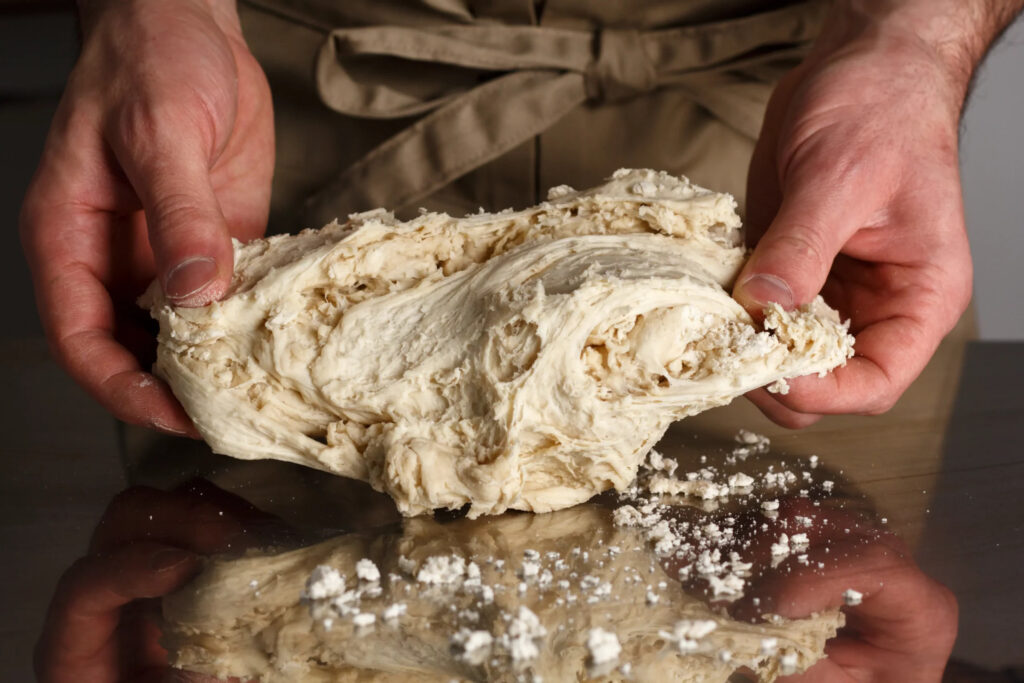
  4. Once the dough starts coming together and forms 5-6 large, smooth blocks, the mixing is complete.

The dough should be stiff but fully hydrated. A well-mixed biga will have a coarse, uneven texture, and the flour should not remain dry or powdery.

c. Fermentation and Resting Time

After mixing, it’s crucial to let the dough rest for a period of 16 to 20 hours. During this time, the dough should be kept at a cool temperature, ideally around 18°C (64°F). Warmer temperatures will speed up fermentation, while cooler temperatures will slow it down.

Place the dough in a large container, covered with perforated plastic wrap to allow some airflow. Breaking the dough into smaller pieces helps increase the surface area exposed to oxygen, promoting aerobic fermentation at first, which encourages yeast activity.

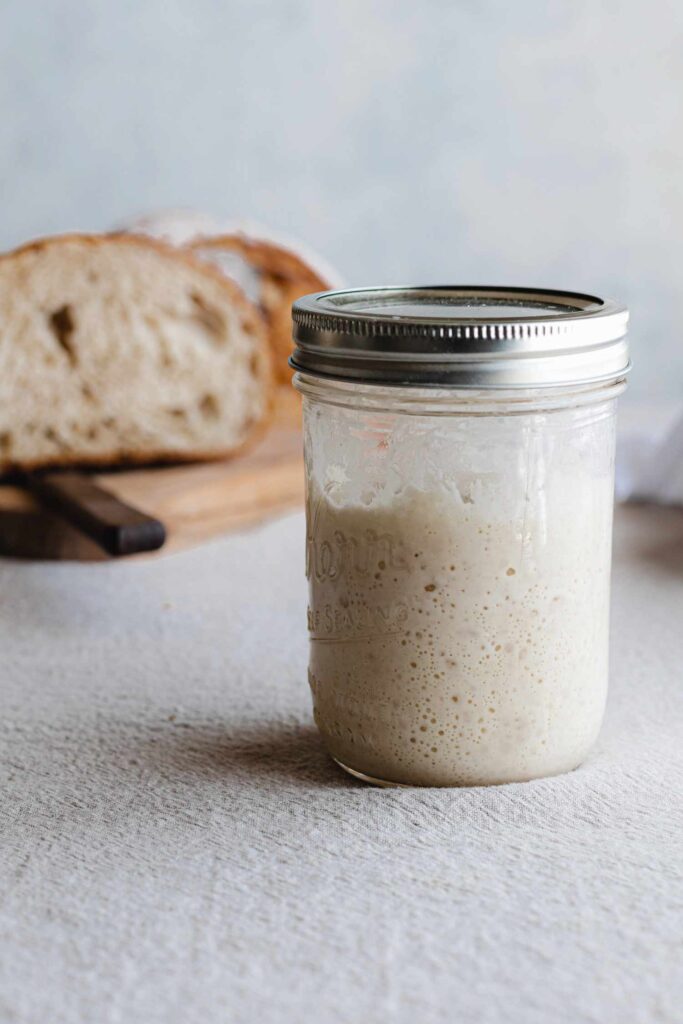
d. Recognizing a Ready Biga

After 20 hours, the biga should have doubled in volume, with a distinctive alcoholic-acidic aroma. The surface should be slightly tacky, with very few shiny patches.


Common Mistakes

5. Common Mistakes When Making Biga (And How to Avoid Them)

Even though the biga method is straightforward, it’s important to avoid certain pitfalls that can compromise the quality of the final dough.

a. Under-Hydrating the Flour

One of the most common mistakes is not fully hydrating the flour. If the flour remains dry, the fermentation will be uneven, and you may end up with a weak dough that doesn’t rise properly.

b. Inconsistent Temperature Control

Fermentation is highly sensitive to temperature. If the dough is left to ferment at a temperature that is too high, the yeast will become overactive, producing too much gas and alcohol, which can lead to a dough that is too sour or even collapsed. On the other hand, if the temperature is too low, fermentation will be sluggish, and the dough won’t develop the proper flavor or texture.


6. Adjusting Biga for Different Seasons

Temperature is one of the most crucial factors in controlling fermentation, and seasonal changes can greatly impact the behavior of your dough. Here’s how to adjust the biga method based on the time of year:

a. Summer

During the hotter months, you will need to reduce the amount of yeast in your biga. In some cases, you can lower the yeast content from 1% to 0.5%, as warmer temperatures will naturally speed up the fermentation process.

b. Winter

In colder conditions, you can increase the yeast content slightly, or alternatively, allow for a longer fermentation period to compensate for the lower temperatures.


7. Using Biga in Neapolitan Pizza Dough: An Expert’s Guide

Once your biga has fermented for the required time, it’s time to incorporate it into the final dough for your pizza. When making Neapolitan pizza, the biga will typically constitute about 30% of the total dough weight.


Mastering the Biga Method for Superior Pizza and Bread

The Biga method is a cornerstone of Italian pizza and bread-making, offering bakers and pizzaioli the opportunity to create dough with exceptional flavor, texture, and digestibility. By understanding the science behind biga

Want to learn more about mastering the Biga method? Connect with me for expert consulting services, whether you’re perfecting your pizza dough or innovating your restaurant menu.

Read More
Joe Stanchi
COME GESTIRE IL LIEVITO MADRE O PASTA MADRE: IMPARARE A CAPIRLO E CURARLO

I prodotti con lievito madre

sono prodotti che a livello organolettico hanno una complessità di sapori/odori molto più ricca e una conservabilità molto più alta. Gestire una pasta madre è molto semplice, ma non altrettanto lo è imparare a capire la propria pasta madre e saper intervenire quando si sbilancia e o si indebolisce o, se è troppo forte o inacidisce.

La mia quindi vuole essere una guida breve ma spero abbastanza completa e utile su come si rinfresca una pasta madre per la gestione ordinaria, come si rinfresca per prepararla ai grandi lievitati come panettone, pandoro e colombe e come riconoscere se è matura, se è in salute o se è eccessivamente debole o eccessivamente forte.

COME RINFRESCARE IL LIEVITO NELLA GESTIONE ORDINARIA:

il lievito madre andrebbe rinfrescato una volta a settimana se tenuto in frigo; oppure ogni 48 ore se tenuto a temperatura ambiente; io, tuttavia, lo tengo anche 1 mese senza rinfrescarlo; poi di tanto in tanto effettuo dei rinfreschi ravvicinati per farlo tornare in forma. Il lievito madre è più difficile da far morire di quanto crediate. Molti lo buttano via perché magari non l’hanno rinfrescato per 1 o due mesi, senza provare a recuperarlo; vi assicuro che nella maggior parte dei casi basterebbe solo rinfrescarlo più volte finché  torna a raddoppiare in 3 o 4 ore e a profumare di frutta fermentata, mosto o miele.


Il lievito normalmente va rinfrescato in questo modo (partendo da un’unita di 100g):
100g di pasta madre + 100g di farina + 45g di acqua
Come farina vi consiglio di usare una Manitoba; per la gestione ordinaria va bene anche una Manitoba economica; poi quando preparerete la pasta madre per i grandi lievitati comincerete dai giorni precedenti ad abituare la pasta alla nuova Manitoba iniziando a inserire un 30% della nuova insieme a un 70% della vecchia e poi passando alla nuova.

Impastate a lungo fino ad ottenere un composto liscio, elastico e omogeneo; poi formate una palla, fate un taglio a croce in superficie, riponetelo in un contenitore di vetro di misura (con un diametro simile o di poco superiore a quello della pasta madre); chiudete con il coperchio frapponendo un foglio di carta assorbente tra il barattolo e il tappo. Fate crescere per 1 ora al caldo per far partire la fermentazione e poi mettete in frigo fino al successivo rinfresco.


Potete diminuire o aumentare la dose di lievito da rinfrescare, mantenendo però le proporzioni 1:1:45; quindi stessa quantità di pasta madre e farina e il 45% di acqua sul peso della farina. Es. 50g di lievito + 50g di farina + 23g di acqua

PREPARARE IL LIEVITO PER I GRANDI LIEVITATI:

per quanto riguarda i consigli che sto per dare per questa sezione devo ringraziare Susanna, che gestisce insieme a Barbara un blog che vi consiglio di visitare.

Il mondo dei lievitati è immensamente vasto e non si finisce mai di imparare. Nel mio blog dunque troverete magari anche indicazioni diverse su come preparare la pasta madre ai grandi lievitati, perché con il tempo imparo nuove cose, sperimento nuovi metodi, divento più esperta di certi argomenti e quindi mano a mano seguo nuove metodologie grazie anche ai consigli di altri/e  blogger con cui mi confronto.

Recentemente, grazie appunto ad alcune indicazioni datemi da Susanna, ho iniziato a rinfrescare il lievito in acqua nei giorni che precedono quello in cui inizio la preparazione del panettone ed è quindi questo metodo che illustrerò.


Una premessa d’obbligo:

la gestione in acqua è abbastanza dispendiosa in termini di spreco di farina; è bene infatti rinfrescare almeno 100g di pasta dato che una parte si perderà perché a contatto con l’acqua diventerà melmosa e una parte, quella in superficie, si seccherà a contatto con l’aria.

Questo metodo però è ottimo per tenere sotto controllo l’acidità della pasta madre. Questo non significa, che, se non vi è congeniale, non possiate continuate a rinfrescarlo come fate di solito. L’importante è saper osservare, assaggiare e odorare la propria pasta madre per capirne le caratteristiche e intervenire in modo da correggerla e bilanciarla in modo che sia matura e con il giusto grado di acidità, come vedremo in seguito.

Nella preparazione per i grandi lievitati la pasta madre andrebbe rinfrescata tutti i giorni per 5 giorni consecutivi.


In quei giorni rinfrescate il lievito così:

100g di lievito madre + 100g di farina Manitoba (quella che userete per il panettone, pandoro ecc..) + 40-45g di acqua


Spezzettate il lievito a mano, senza compattarlo, aggiungete l’acqua e 3/4 della farina.

Impastate e poi mano a mano aggiungete la restante farina.

Lavorate la pasta a lungo finché sarà elastica, liscia e omogenea; in seguito, perché i lieviti si distribuiscano più uniformemente nell’impasto, stendete la pasta madre con il mattarello; dovete ottenere una striscia di 1/2cm di spessore circa; poi ripiegate il lembo più lontano verso il centro (ovvero verso di voi) e infine piegate il lembo più vicino a voi sopra l’altro a portafoglio, come si fa per la pasta sfoglia.

Ruotate ora il panetto così ottenuto di 90° in senso orario, stendete di nuovo e ripetete l’operazione precedente. Fate questa operazione per 4 o 5 volte; poi ristendete la pasta e cilindratela: arrotolatela cioè su se stessa, piegatela a metà cercando di darli una forma un po’ sferica; posizionatela sul fondo di un contenitore cilindrico alto che sia abbastanza di misura; ovvero che abbia un diametro all’incirca uguale o di poco superiore al diametro della pasta madre e ce sia abbastanza alto,; va bene il bicchiere del minipimer ad esempio) e coprite con acqua a 22° fino al giorno successivo.

Rinfrescate la pasta madre in questo modo fino al giorno che precede quello in cui farete i tre rinfreschi giornalieri per poi procedere con il primo impasto.

IL GIORNO IN CUI PARTIRETE CON IL PRIMO IMPASTO DEL PANETTONE RINFRESCATE 3 VOLTE A DISTANZA DI CIRCA 4 ORE UNA DALL’ALTRA IN QUESTO MODO:

1° rinfresco: 100g di pasta madre + 100g di farina Manitoba (quella che userete per il panettone, pandoro ecc..) + 35-40g di acqua (dipende da quanto riuscite a strizzare il lievito una volta tolto dall’acqua)

Impastate, cilindrate e fate lievitare per 3 ore a 28° e 1 ora (anche 1/2 ora se il lievito è già pronto) a temperatura ambiente


2° rinfresco: 100g di pasta madre + 100g di farina Manitoba (quella che userete per il panettone, pandoro ecc..) + 45g di acqua

Impastate, cilindrate e fate lievitare per 3 ore a 28° e 1 ora (anche mezz’ora se il lievito è già pronto) a temperatura ambiente


3°rinfresco: stesso procedimento e dosi del 2°
A questo punto potete procedere con il primo impasto del vostro lievitato.

IMPARARE A VALUTARE LA PROPRIA PASTA MADRE PER CAPIRE SE È MATURA E IN FORMA O SE NECESSITA DI QUALCHE INTERVENTO CORRETTIVO

Una pasta madre in ottima salute si presenta così:


ASPETTO: colore avorio con alveoli allungati ovali, ph 5

ODORE: delicatamente acido e con dei sentori di mosto, frutta fermentata o miele

SAPORE: dolce con una delicata nota acida, poco pronunciata

TEMPO DI MATURAZIONE: (cioè il tempo in cui raddoppia o addirittura aumenta di 1,5 volte il suo volume):

3-4 ore


Un lievito troppo forte si presenta così:


ASPETTO: colore tendente al grigio con alveoli rotondi e ph 3-4.

ODORE: marcatamente acido

SAPORE: acido-amaro


Nel caso in cui il lievito sia troppo forte, procedete a fare un bagnetto. Tagliate il lievito a fette di 1cm di spessore; immergetele in acqua a 21° con 2g di zucchero per litro per un tempo massimo di 20 minuti; poi rinfrescate in questo modo:

50g di pasta madre + 100g di farina + 45g di acqua


Un lievito debole si presenta così:


ASPETTO: colore bianco con alveoli piccoli, fitti e rotondi. La consistenza è molto compatta e poco elastica e quando si spezza, si rompe.

ODORE: poco intenso e povero, dolce con sentore di farina

SAPORE: di farina, privo di acidità, ph 6-7


Nel caso di un lievito debole rinfrescate così:

100g di pasta madre + 50g di farina + 25g di acqua

Read More
Joe Stanchi
I DANNI PROVOCATI DAL GLUTINE

Da un articolo dell’Authority Nutrition è venuto fuori che negli ultimi anni la consapevolezza sui danni provocati dal Glutine sulla salute delle persone è molto cresciuta.

L’alimentazione senza Glutine non è soltanto una delle solite mode. Ormai sono tantissimi gli studi che dimostrano i danni che il Glutine provoca sulla salute di persone celiache e persone intolleranti al glutine.

Cercheremo di semplificare i risultati di questa ricerca scientifica americana in 6 piccoli punti chiari ed esplicativi.

1- La Celiachia è in forte aumento, anche se non ancora ampiamente diagnosticata.

Come già sappiamo il glutine, una proteina composta da altre due proteine: la Gliadina e la Glutenina, è presente nella maggior parte dei cereali comunemente usati nella nostra dieta mediterranea: farro, frumento, grano, kamut etc. Quando le farine di questi cereali vengono a contatto con l’acqua, inizia un processo “colloso” che conferisce proprietà elastica all’impasto, cosa che permette di ottenere, man mano che viene lavorato, il pane, la pizza etc. Infatti, il termine Glutine, viene dal verbo agglutinare, che significa unire più elementi con sostanze adesive, come se fosse colla.

2- Gli anticorpi del celiaco, in presenza di glutine, agiscono in maniera aggressiva generando danni al tratto digestivo.

Quando il Glutine arriva nel tratto digestivo, entra in contatto con le cellule del sistema immunitario. Le cellule, per errore, lo scambiano per un invasore esterno, un po’ come avviene per i batteri.

Nei soggetti più sensibili al Glutine, accade che, il sistema immunitario inizia a scatenare attacchi contro la sostanza, percepita come estranea e nemica. Nella Celiachia, la forma più acuta e grave di intolleranza al Glutine, il sistema immunitario non si limita ad attaccare la proteina, ma estende il suo attacco anche all’enzima presente nel tratto digestivo, la Transglutaminasi, causando carenze nutrizionali, problemi di digestione, anemia, affaticamento, accresciuta difficoltà a contrastare le malattie, maggiore esposizione al rischio di contrarre malattie gravi.

Conclusione: la Celiachia colpisce almeno l’1% della popolazione, è in forte aumento, l’80% dei malati non ne è consapevole.

3- L’intolleranza al Glutine è più diffusa di quel che si crede, può avere conseguenze molto serie.

Non sono solo i celiaci a soffrire delle conseguenze da intolleranza al Glutine. Esiste anche la sensibilità al Glutine, che è molto diffusa. Anche se non esiste una descrizione chiara per questa sensibilità, in linea di massima, significa avere dei disturbi che diminuiscono, notevolmente, con un regime alimentare privo di Glutine.

Se hai qualche tipo di sensibilità al Glutine, ma non ti è stata diagnosticata la Celiachia, ti trovi ad avere una intolleranza, non celiaca, al Glutine. In questo caso non c’è attacco alle pareti intestinali, però, molti dei sintomi sono simili a quelli della Celiachia: gonfiore, mal di stomaco, affaticamento, diarrea, dolore alle ossa e alle giunture.

4- Non c’è una diagnosi per scoprire se si è intolleranti al glutine.

Sfortunatamente, dato che non c’è possibilità di avere una diagnosi per scoprire l’intolleranza al Glutine, non è possibile avere numeri credibili sulla diffusione di questa ipersensibilità.

Alcune fonti, parlano di una percentuale di sensibilità al Glutine pari al 6-8% della popolazione; i dati sono stati elaborati a partire dalla quantità di anticorpi antiglandina, presenti nel sangue.

Partendo dal fatto che non c’è una descrizione chiara di cosa sia l’intolleranza al Glutine, mancando i mezzi diagnostici per rilevarla, l’unico modo efficace per contrastarla consiste nell’eliminazione del Glutine dall’alimentazione per un po’ di tempo, per reintrodurlo in seguito e, in questo modo, controllare se insorgono sintomi.

Conclusione: l’intolleranza al Glutine è molto più diffusa della Celiachia, è responsabile di molti disturbi. Sfortunatamente non ci sono ancora strumenti validi per una chiara diagnosi.

5- Il Glutine può provocare effetti dannosi, anche su chi non ha intolleranza o sensibilità.

Ulteriori ricerche provano che, anche chi non ha la Celiachia o tipi di intolleranza, può avere reazioni negative al Glutine.

In particolare, in una delle ricerche effettuate, sono state scelte 34 persone col disturbo dell’intestino irritabile e divise in due gruppi, che dovevano seguire due tipi di dieta: una con Glutine, l’altra senza.

Il gruppo che seguiva la dieta con Glutine presentava un aumento del dolore intestinale, diarrea, gonfiore e un maggiore senso di affaticamento, rispetto al gruppo che seguiva un’alimentazione senza Glutine.

6- Il glutine danneggia la barriera difensiva dell’intestino.

Il Glutine produce effetti negativi sulla barriera difensiva dell’intestino, quella che deve impedire a sostanze tossiche di entrare in circolo nel sangue. Questo effetto negativo, però, non è del tutto confermato, in genere è un disturbo presente solo nelle persone che hanno una Celiachia conclamata.

La sindrome dell’intestino irritabile riguarda una molteplicità di problemi digestivi, ma le cause non sono del tutto chiare e ci sono validi motivi per affermare che, una delle cause principali, è la reazione al Glutine.

E’ necessario approfondire questo scenario con ulteriori ricerche, ma pare chiaro che non sono solo i celiaci a soffrire dei danni negativi provocati dal Glutine.

Conclusione: è provato che le persone con intestino irritabile, anche in assenza di una diagnosi di intolleranza al Glutine, subiscono effetti negativi in presenza di questa proteina.

Read More
Joe Stanchi
Pizza senza glutine con la farina di grano saraceno, ecco la ricetta

Chi è celiaco non deve per forza rinunciare a uno dei simboli più rappresentativi dell’Italia in cucina oltre che piatto famoso in tutto il mondo: si può infatti preparare la pizza senza glutine con un impasto a base di farina di grano saraceno, e la si può consumare in tutta sicurezza. Il grano saraceno infatti pur chiamandosi così è una delle farine senza glutine più utilizzate per preparare non solo la pizza ma anche pane, dolci e altri prodotti da forno, nonché i pizzoccheri valtellinesi.

Pizza senza glutine, ingredienti e procedimento

Per preparare questa ricetta servono:

Per l’impasto
400 gr di farina di grano saraceno
10 gr di lievito di birra fresco
un cucchiaino raso di sale
un cucchiaio di olio extravergine di oliva

Per il condimento
200 gr di mozzarella in panetto
salsa di pomodoro q.b.
olio extravergine q.b.
origano q.b
sale q.b.

L’impasto preparato con la farina di grano saraceno è diverso dal solito ma rappresenta una sfiziosa alternativa anche per tutti gli amanti della pizza, non solo i celiaci, anche perché è più digeribile. Si parte disponendo su una spianatoia di legno la farina a fontana. Dopo aver sciolto il lievito in un po’ d’acqua, in cui avreste sciolto il cucchiaino di sale, la si versa a poco a poco sulla farina iniziando a impastare. Aggiungete l’olio e ancora acqua se necessario finchè non otterrete un panetto liscio e omogeneo. Ponete l’impasto in una ciotola, coprite con la pellicola trasparente e mettete a lievitare in un luogo caldo (ad esempio nel forno con la luce accesa o accanto a un calorifero in inverno) per almeno 2/3 ore, finché il tutto non avrà raddoppiato il suo volume.

Trascorso questo tempo oliate una teglia per pizza e versate al suo interno l’impasto. Iniziate a lavorarlo e a stenderlo bagnandovi i polpastrelli con l’olio per far sì che non attacchi. Se desiderate una pizza più soffice, dopo aver preparato la teglia mettetela ancora a lievitare. Preparate a parte la salsa con il pomodoro, olio, sale e origano a piacere e cospargetela sulla superficie della pizza. Aggiungete la mozzarella tagliata a dadini e infornate a 250 gradi per 10 minuti (ma il tempo di cottura dipende dal tipo di forno e dallo spessore della pasta, controllate periodicamente che si cuocia bene sul fondo sollevando la pizza dalla teglia con l’aiuto di una forchetta). Al termine della cottura servite.

Read More
Joe Stanchi
Che tipo di mozzarella?

Latte, fermenti lattici, caglio e sale. Sono questi i “4” ingredienti della vera mozzarella di qualità.

Il processo di produzione è semplice, ma richiede delle fasi precise e dettagliate partendo da quella in cui si aggiungono i fermenti lattici al latte fresco, per ottenere un’ambiente acido, e poi il caglio ricavato dallo stomaco dei bovini per ottenere la cagliata. Questa deve riposare per 3-4 ore per poi procedere infine all’aggiunta del sale e alla bollitura dell’impasto (la filatura) e al raffreddamento che la trasformerà in mozzarella.

Anche se è uno dei prodotti più consumati dagli italiani (il 95% dichiara di consumarne almeno una al mese), pochissimi sanno che in commercio ci sono 5 o 6 tipologie di mozzarella, che si differenziano tra loro in base alle materie prime con le quali sono prodotte.

Non sempre infatti il latte fresco fa da padrone in questo processo. Soprattutto per il costo elevato delle materie prime (5/6 euro al kg), si fa sempre più ricorso all’uso di cagliate conservate ossia semilavorati ottenuti sempre dal latte ma meno costosi perchè prodotti in paesi più competitivi come Germania, Lituania e Polonia, dove latte e lavorazione costano meno.

Un’altra variante per accelerare e sorpassare la fase della fermentazione è sostituire i fermenti lattici con acidi citrici e lattici, oppure esiste anche la “mozzarella” senza latte, ottenuta dalla cagliata sciolta in acqua calda.

Infine troviamo la mozzarella “all’americana”, o pasta filante, usata soprattutto per la pizza, prodotta con cagliate conservate miscelate con proteine del latte in polvere ed eventualmente formaggio fuso per migliorare le proprietà di filatura una volta cotta.

La normativa vigente purtroppo non obbliga le aziende a riportare sulle etichette l’indicazione di origine delle materie prime dei formaggi e per questo motivo il ricorso alle cagliate è in costante aumento.

Michele Faccia e Aldo Di Luccia, docenti alla Facoltà di Agraria all’Università di Bari, hanno messo a punto un sistema per capire se una mozzarella è stata fatta con latte fresco o con sottoprodotti. Essi affermano inoltre che di fronte a tanta confusione c’è l’esigenza di ridefinire le categorie merceologiche (come avvenne per il latte pastorizzato con la legge 169/89) e far capire alla gente che la mozzarella si fa solo attraverso un tipo di procedimento.

Tutti gli altri formaggi a pasta filata, che costano meno e che rappresentano circa il 50% del mercato, possono continuare ad essere commercializzati solo a patto che si definiscano con esattezza gli ingredienti sull’etichetta.

Read More
Joe Stanchi
Comè nata la pizza margherita
Nato nel XIX secolo, quello che abbiamo conosciuto come "pizza" è cominciato come pasta utilizzata dai panettieri per determinare la temperatura dei forni. Realizzando il suo potenziale come un pasto veloce e facile da preparare, così come un modo per sbarazzarsi di ingredienti che altrimenti andrebbero a perdere, è diventato noto come "il piatto della gente", ed è stato venduto per le strade d'Italia

All'epoca, Raffaelle Esposito, proprietario di una piccola taverna del comune di Napoli, è stata considerata da molti come il primo produttore di pizza della città. Avendo preso l'occhio della regina Margherita di Savoia, lo Chef Esposito era incaricato di preparare sia il Re che la Regina una pizza.

Un italiano veramente orgoglioso, lo Chef Esposito avrebbe usato una combinazione di pomodori, mozzarella e basilico per emulare i colori della bandiera italiana. La regina ha apprezzato molto la pizza; Ha continuato ad elogiare lo chef, rendendolo una celebrità tra i poeple. In cambio, lo Chef Esposito chiamerebbe il suo nuovo piatto la "Pizza Margherita", e così nasceva la pizza.

Nella nostra ricerca per onorare il padre della pizza moderna, le pizze di Sofia sono fatte usando solo gli ingredienti più belli. Dalla farina a mano dalle valli italiane della Campania, ai pomodori San Marzano DOP del Monte Vesuvio, i nostri ingredienti sono ciò che rende le nostre pizze non solo deliziose ma autentiche.

Per solidificare la nostra autenticità, il nostro forno a legna da 900 gradi di bruciatura garantisce che ciascuna delle nostre pizze sia cotta alla perfezione.


MOZZARELLA DI BUFALA CAMAPANA DOP

Derivato dal verbo "mozzare" (per tagliare), l'espressione "mozzarella" è un termine usato per descrivere il processo in cui i formaggi friabili formaggi vengono fatti a mano, utilizzando una tecnica con le dita di indice e i pollici, in singole mozzarelle.

Sofia è orgogliosa di utilizzare Mozzarella di Bufala Campana DOP, un formaggio prodotto esclusivamente dal latte di bufali provenienti dalle regioni della Campania italiana.

POMODORO SAN MARZANO DOP

I pomodori di San Marzano sono una varietà di pomodori di prugne considerati i migliori pomodori di salsa al mondo. La storia narra che il primo seme del pomodoro di San Marzano è venuto in Campania nel 1770, dono del Regno di Perù al Regno di Napoli e che è stato piantato nella zona che corrisponde all'attuale comune di San Marzano sul Sarno

Provengono da una piccola città con lo stesso nome vicino a Napoli, in Italia e sono stati coltivati ​​in terreno vulcanico all'ombra del Vesuvio. La maggior parte dei produttori di pomodori di San Marzano a Napoli sono famiglie, ognuna con una piccola trama, forse un acro.
Read More
it_ITIT

Content is protected. Right-click function is disabled.