The Ultimate Guide to Making Sourdough Starter at Home
The Ultimate Guide to Making Sourdough Starter at Home: A Journey into Traditional Baking
Sourdough, one of the oldest forms of leavened bread, has been a staple in the diets of many civilizations for centuries. Its recent resurgence in home kitchens and artisanal bakeries around the world is no coincidence—baking with sourdough connects us to tradition, flavor, and a natural fermentation process that is both healthier and more sustainable than using commercial yeast. At the heart of sourdough bread is the sourdough starter, a simple mixture of flour and water that captures wild yeast and beneficial bacteria from the environment to naturally leaven bread.
In this comprehensive guide, we’ll walk you through everything you need to know about making and maintaining your own sourdough starter at home. We will also dive into the science behind sourdough fermentation, the benefits of using sourdough over commercial yeast, and how to use your starter in a variety of delicious recipes—from traditional bread loaves to pizza and pastries. Whether you’re a beginner or an experienced baker, this guide will help you master the art of sourdough and take your home baking to the next level.
Why Make Your Own Sourdough Starter?
While many home bakers rely on store-bought yeast for convenience, creating your own sourdough starter opens up a world of flavor, texture, and health benefits that commercial yeast simply can’t match. Here are a few reasons why making your own sourdough starter is worth the effort:
- Superior Flavor: Sourdough bread has a distinctive tangy flavor that develops during the long fermentation process. The lactic acid produced by the bacteria in the starter adds depth and complexity to the bread’s taste, which is something you won’t get from bread made with instant yeast.
- Improved Digestibility: The fermentation process involved in sourdough breaks down gluten and other complex carbohydrates, making the bread easier to digest. This can be beneficial for individuals with mild gluten sensitivities or those looking for a healthier alternative to commercially leavened bread.
- Nutritional Benefits: Sourdough bread has a lower glycemic index than bread made with commercial yeast, meaning it can help regulate blood sugar levels more effectively. The long fermentation process also makes nutrients like zinc, magnesium, and iron more bioavailable, leading to better overall nutrition.
- Longer Shelf Life: The acidity of sourdough inhibits the growth of mold, giving your bread a longer shelf life without the need for preservatives. Properly made sourdough can stay fresh for up to a week.
- Sustainability: Making your own starter is a sustainable, waste-free process. Once your starter is active, you can use it to leaven bread, pizza, and other baked goods indefinitely as long as it is properly maintained. This means no more reliance on store-bought yeast packets.
The Science Behind Sourdough: Fermentation and Wild Yeast
At the core of sourdough baking is fermentation, a natural process that uses wild yeast and lactic acid bacteria to leaven dough. Unlike commercial yeast, which is a single species of yeast (Saccharomyces cerevisiae) that works quickly to rise dough, sourdough starter is home to a diverse community of microorganisms, including wild yeast and lactic acid bacteria.
The yeast in your starter consumes sugars in the flour and produces carbon dioxide gas, which causes the dough to rise. Meanwhile, the lactic acid bacteria produce lactic acid and acetic acid, which not only give sourdough its characteristic tang but also improve the dough’s texture and shelf life.
Wild Yeast vs. Commercial Yeast
- Wild yeast: Found naturally in flour and in the environment, wild yeast works slower than commercial yeast, but it adds complex flavors and better digestibility to the bread. It can survive in a more acidic environment, which is why it thrives in sourdough starters.
- Lactic acid bacteria: These beneficial bacteria coexist with wild yeast in your starter and play a critical role in the fermentation process. They are responsible for the production of acids, which lower the dough’s pH and create a tangy flavor profile.
This symbiotic relationship between wild yeast and lactic acid bacteria is what makes sourdough unique. It results in a longer fermentation process but rewards you with deeper flavors, improved texture, and enhanced nutrition.
Step-by-Step Guide: How to Make Sourdough Starter at Home
Creating a sourdough starter at home requires just two basic ingredients: flour and water. However, it also requires patience, as it takes time for the starter to become fully active and ready for baking. Follow this step-by-step guide to create your own sourdough starter from scratch.
Ingredients:
- 100g water (preferably filtered or non-chlorinated)
- 200g flour (type 1 flour, whole grain, or rye works best for creating a robust starter)
Equipment:
- A clean glass or plastic container
- A spoon or spatula for mixing
- Plastic wrap or a clean kitchen towel for covering
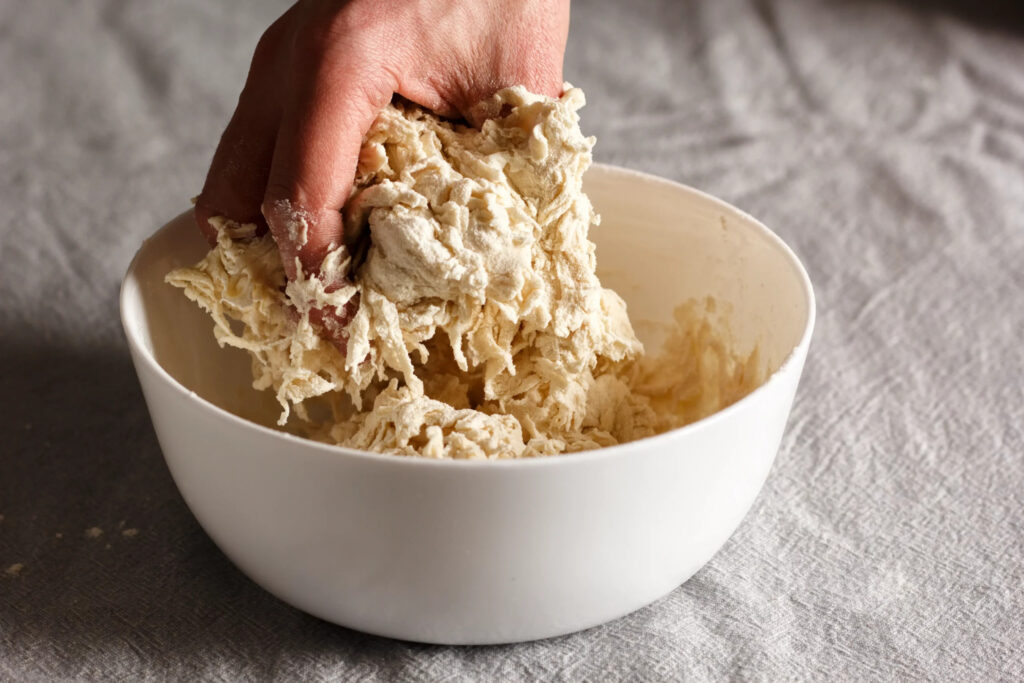
Phase 1: The Initial Mix
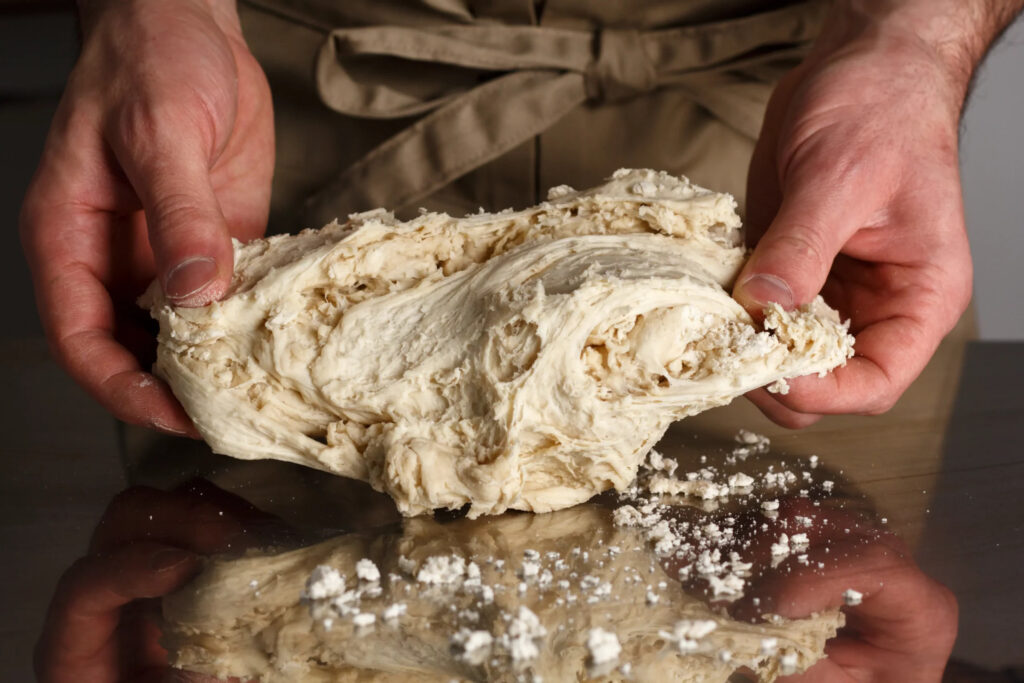
- In a clean bowl, combine 100g of water with 200g of flour. Stir until a smooth, lump-free dough forms.
- Transfer the dough to a glass container, cover it loosely with plastic wrap or a kitchen towel, and let it sit at room temperature (ideally around 22-25°C or 72-77°F) for 12-24 hours.
During this time, the wild yeast and bacteria will begin to activate, although you might not notice any visible changes immediately.
Phase 2: First Feeding (24 Hours Later)
- After the first 24 hours, discard about half of the mixture (this helps control the acidity and gives the yeast more food to work with).
- Add 100g of fresh water and 100g of flour to the remaining mixture. Stir well to combine, then cover again and let it sit at room temperature for another 24 hours.
Phase 3: Regular Feedings (Days 3-7)
Continue feeding your starter every 24 hours by discarding half of the mixture and replacing it with equal parts water and flour. By the third or fourth day, you should start to notice small bubbles forming in the mixture, indicating that fermentation is taking place.
As the days go by, the starter will become more active, and you may notice a tangy aroma developing.
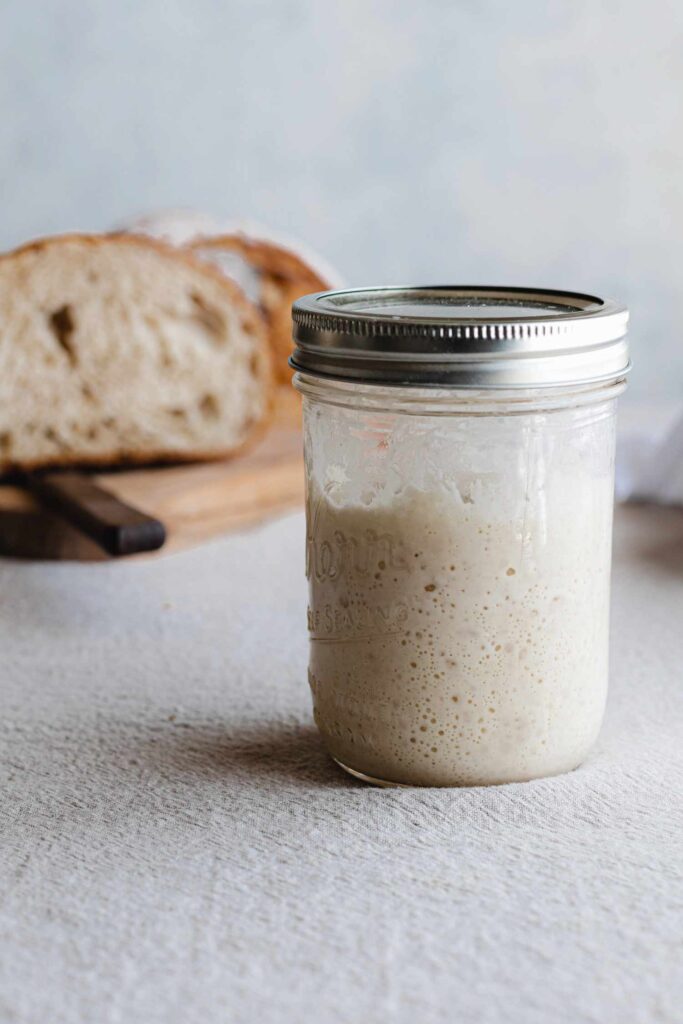
Phase 4: Ready for Baking (Day 7 and Beyond)
By the end of the first week, your sourdough starter should be bubbly, have a pleasant, tangy smell, and double in size a few hours after feeding. Once it reaches this point, it is ready to be used for baking.
To test if your starter is ready, place a spoonful of it in a glass of water. If it floats, your starter is active enough to leaven bread. If it sinks, continue feeding it for a few more days.
How to Maintain and Store Your Sourdough Starter
Once your sourdough starter is active, it requires regular maintenance to stay healthy. If you’re baking frequently, you can keep it at room temperature and feed it once a day. However, if you only bake occasionally, it’s better to store your starter in the refrigerator.
Refrigeration Method:
- Feed your starter, then let it sit at room temperature for a few hours until it becomes bubbly and active.
- Cover the container and place it in the refrigerator. A refrigerated starter only needs to be fed once a week.
- When you’re ready to bake, remove the starter from the fridge, discard half, and feed it. Let it sit at room temperature until it becomes bubbly and doubles in size, then use it in your recipe.
Baking with Sourdough Starter: Recipes and Tips
Once your sourdough starter is fully active, it can be used in a variety of recipes. The most common use, of course, is in baking bread, but you can also incorporate your starter into pizza dough, pancakes, waffles, and even pastries. Here are a few tips for using your sourdough starter in different recipes:
- Sourdough Bread: The key to great sourdough bread is time. Allow the dough to ferment slowly for the best flavor and texture. Aim for a bulk fermentation of at least 4-6 hours, followed by a final proof in the refrigerator overnight.
- Sourdough Pizza: Sourdough makes an excellent base for pizza, particularly the Neapolitan style. Use a wet dough and let it ferment for 24 hours to develop the characteristic tang and soft, chewy texture. Pair with high-quality ingredients like San Marzano tomatoes, fresh mozzarella, and extra virgin olive oil for an authentic experience.
- Sourdough Pancakes and Waffles: A great way to use excess sourdough discard is in pancakes or waffles. The fermentation adds a light, fluffy texture and a slight tang that pairs well with syrup or fruit.
Common Mistakes to Avoid
As with any baking process, there are common pitfalls that can hinder your success. Here are a few to keep in mind:
- Not feeding your starter enough: Underfeeding can lead to a weak starter that struggles to rise. Make sure to feed your starter regularly, especially if you keep it at room temperature.
- Over-fermenting the dough: While long fermentation times are key to developing flavor, over-proofing your dough can result in bread that is dense or collapsed. Keep an eye on the dough and avoid letting it rise too much before baking.
- Using too much flour or water: Maintaining a consistent ratio of flour and water is crucial to keeping your starter healthy. If the mixture becomes too dry or too wet, the wild yeast and bacteria may struggle to thrive. Stick to the recommended feeding ratios for the best results.
Using improper water: Chlorinated or highly mineralized water can hinder the growth of the natural yeast and bacteria in your sourdough starter. Always use filtered or non-chlorinated water when feeding your starter to avoid this issue.
Neglecting temperature control: Temperature plays a significant role in the activity of your starter. If the environment is too cold, the fermentation process will slow down, while too much heat can cause over-fermentation. - Try to keep your starter in a spot with consistent room temperature (around 22-25°C or 72-77°F).
Expert Tips for Achieving Sourdough Perfection
If you want to take your sourdough baking to the next level, here are a few expert tips that will elevate your results:
Autolyse Technique: This is a resting period where the flour and water are mixed and left to hydrate before adding the sourdough starter. This process strengthens the dough, makes it easier to handle, and results in a better crumb structure.
Stretch and Fold Method: Instead of kneading your dough, use the stretch and fold technique during the bulk fermentation phase. This method helps develop gluten without overworking the dough, leading to a more open crumb and better oven spring.
Use a Dutch Oven: For a crisp, golden crust and excellent oven spring, bake your sourdough bread in a preheated Dutch oven. The enclosed environment traps steam, which helps create the perfect crust.
Cold Fermentation: After shaping your dough, let it proof in the refrigerator for 12-24 hours. This slow fermentation process enhances the flavor and makes the dough easier to work with, especially when scoring.
Common Issues and How to Fix Them
Even experienced bakers encounter problems with their sourdough from time to time. Here are a few common issues and how to address them:
Flat Bread: If your bread isn’t rising properly, your starter may not be active enough. Try giving it a few extra feedings before using it in your dough. Additionally, make sure you’re allowing enough time for bulk fermentation and final proofing.
Dense Crumb: A dense, heavy crumb can be the result of under-fermentation. Ensure that your dough has enough time to ferment and proof properly. Also, avoid adding too much flour when shaping the dough.
Sour Taste: If your bread tastes too sour, it may have over-fermented. Try reducing the fermentation time or lowering the hydration level slightly to prevent excessive acid production.
Sticky Dough: If your dough is too sticky to handle, you may need to adjust the hydration level. Sourdough dough tends to be wetter than regular bread dough, but if it’s too difficult to work with, reduce the amount of water slightly or give it more time to develop gluten through folding.
The Role of Sourdough in Pizza Making
Sourdough isn’t just for bread—it’s also a fantastic base for pizza, especially if you’re aiming for that soft, chewy, and slightly tangy crust that defines a perfect Neapolitan pizza. The natural fermentation process adds layers of flavor that you just can’t achieve with commercial yeast.- Sourdough Neapolitan Pizza Recipe:
Ingredients:
500g Type 00 flour (or all-purpose flour)
300g water
100g active sourdough starter
10g salt
10g extra virgin olive oil - Instructions:
In a large bowl, mix the flour and water. Let the mixture rest for 30 minutes (autolyse phase).
Add the sourdough starter, salt, and olive oil. Mix until the dough comes together.
Knead the dough for about 10 minutes or until smooth and elastic.
Let the dough rest at room temperature for 4-6 hours, stretching and folding every 30 minutes during the first 2 hours.
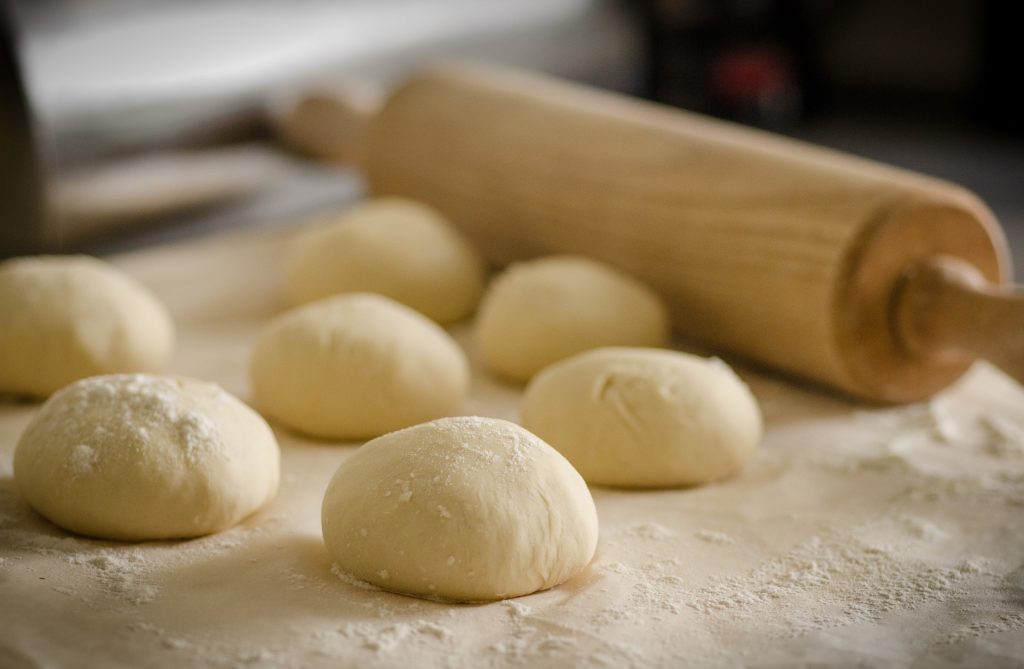
Divide the dough into balls and let them rest for another 2 hours before using them to make pizzas.
Preheat your oven to its highest setting, preferably with a pizza stone or steel.
Shape the dough into rounds, top with your favorite ingredients, and bake for 5-7 minutes until the crust is golden and the toppings are bubbling.
Advanced Sourdough Techniques for the Ambitious Baker
If you’ve mastered the basics of sourdough and want to push your skills further, consider experimenting with some of these advanced techniques:
Laminate Your Dough: This technique, commonly used in croissant making, can be applied to sourdough to create even more open crumb structures and a lighter texture.
Add Whole Grains: Incorporating whole grains into your sourdough can add flavor, texture, and nutritional value. Try using spelt, rye, or whole wheat flour in place of a portion of the white flour.
Enriched Sourdough: Adding ingredients like milk, butter, eggs, and sugar to your dough can create enriched sourdough loaves, which are softer and sweeter than traditional sourdough bread.
Experiment with Hydration Levels: High-hydration doughs (those with more water relative to flour) are more challenging to handle but result in a more open crumb. If you’re comfortable with wet doughs, try increasing the hydration level of your sourdough for more artisan-style bread.
The Art and Science of Sourdough Baking
Making sourdough starter at home is a rewarding process that connects you to a centuries-old tradition of natural fermentation.- By mastering the basic techniques outlined in this guide, you’ll be able to create delicious, nutritious, and flavorful bread with nothing more than flour, water, and time.
From understanding the science of wild yeast and lactic acid bacteria to learning how to maintain and store your starter, you now have all the tools you need to embark on your sourdough journey. Whether you use your starter for classic loaves of bread, pizza, or creative bakes, sourdough offers endless possibilities for experimentation and growth as a baker.
And remember, if you’re ever in doubt, the most important ingredient in sourdough baking is patience. Over time, you’ll develop an intuitive understanding of your starter, your dough, and the fermentation process, allowing you to create beautiful, flavorful bakes every time.
For those passionate about culinary traditions and seeking professional guidance in the art of Neapolitan pizza or contemporary Italian cuisine, feel free to reach out for consultation. - With years of experience in the food and beverage industry, I’m here to help you perfect your craft and bring authentic Italian flavors to your kitchen, wherever you are in the world.
#SourdoughStarter #ArtisanBaking #SourdoughBread #NeapolitanPizza #BakingFromScratch #ItalianCuisine #Fermentation